You got your hands on the rider audio pro bluetooth headset good move. It is not just any other gadget, but it is a game-changer of any rider who appreciates music, calls, and clarity simultaneously. The rider audio system is so easy that you can install it and even though you have never installed a motorcycle bluetooth header previously, you will have it done before your coffee gets cold. We shall simply follow it step by step--there is no need to have any fancy tools, no over-thinking, you just plug, stick and ride.
Step 1: Unbox and Admire
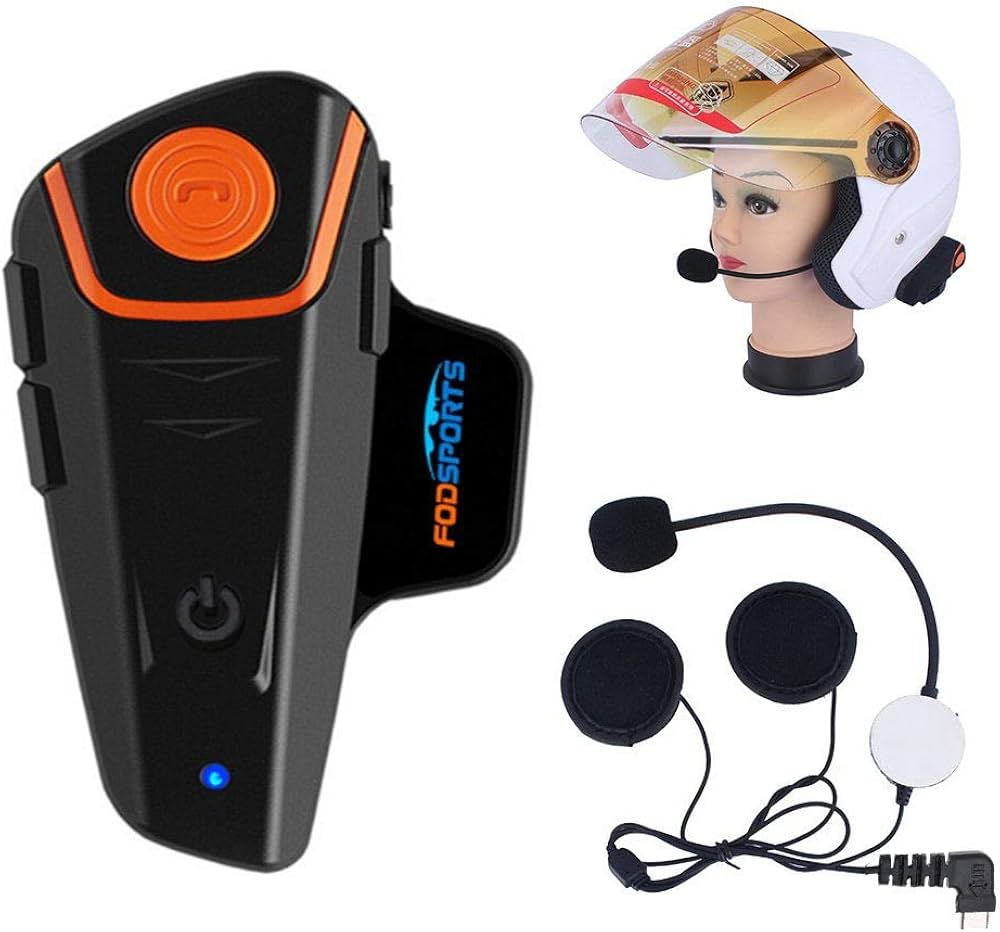
First things first--open that box. The headset, speakers, mic and the mounting accessories will be well packed. Give it a quick once-over. One does not have to be a technological genius to see the fundamentals. It is not a bulky unit but a solid one. The speakers? Not so fat that it would squeeze into your helmet like sausage meat.
Step 2: Prep Your Helmet
Wipe the interior of your ear pad of the helmet with anything before you insert anything. Even a small dust or sweat may destroy the sticking power. Wipe it with a soaked cloth or rubbing alcohol. There is no reason to hurry up--five seconds of cleaning up now will spare you the heartache of peeling gear in the future.
Step 3: Position the Speakers
Unzipped your inner pads of your helmet. You have little holes or level places--you use those as your darlings of the orators. And so place them where your ears would be. When you guess and they come out either too high or too low, your tunes would sound to be in a foreign planet. Test: Before gluing them, place the helmet with your head. When satisfied peel off the adhesive and stick each speaker in place.
Step 4: Mount the Main Unit
Ready your fine head, now--the brains of your headset. You can either stick or clip your helmet on the side depending on your helmet. When adhesive mount is being used ensure that the surface is dry. Press it firmly in the course of ten seconds. Never mind, you will not need Hulk power. Just steady pressure. The clip option is good enough and suitable to people who prefer to take the unit off when not riding.

Step 5: Plug It All In
Make the connection of the speaker cables and the mic to the main unit. The connectors are easy, and you can not confuse them even when you want to. In the case of a full-face helmet, the boom mic should be held close to your mouth, but not on it. In the case of open-face, the wired mic should be used. Stuff the cables under the liner to ensure that they are not spaghetti when riding.
Step 6: Power Up and Pair
Press the power button several seconds till you hear the startup sound or the light of the LED changes to blinking. Hold your phone and open the Bluetooth settings then locate RiderAudio Pro. Tap connect. Done. You may check it by playing a song or making a quick call. It is a sharp sound--bass that is humming, it does not fade away in the wind like the vocals.
Contact Us :
David J. Hayes
1721 Tully Street
Detroit, MI 48219
Phone: 313-601-4310
Website:
https://rideraudio.com/
https://rideraudio.com/products/rideraudio-pro
External links :
rider audio
rider audio pro bluetooth headset
motorcycle bluetooth header
rodecaster pro bluetooth headphones
rider buds earphones
pro audio bluetooth receiver